Are you finding it hard to become skilled at all those Fusion 360 tips that could boost your design workflow? Don’t worry – you’re not alone. Autodesk’s Fusion 360 has made the most important impact on the design world since its 2013 release. Many users barely scratch the surface of what it can do.
Fusion 360’s complete feature set can feel overwhelming. This applies whether you create architectural models or prepare designs for fabrication. The software serves as a powerful cloud-based platform that naturally connects architects, construction teams, and stakeholders. Yet many beginners find it hard to optimize their work. One presenter at Autodesk University 2018 shared 101 tips in just 90 minutes. This shows how packed with features this software really is.
Our team has spent countless hours with Fusion 360. We’ve gathered 10 hidden tips that will revolutionize your daily workflow. These tips range from simple to slightly unusual. Each one helps you work smarter instead of harder. Let’s explore these game-changing Fusion 360 tips and tricks that help both beginners and experienced users.
Master the Sketch Environment
Your design in Fusion 360 starts with the sketch environment. Many users rush through sketching, but mastering this area will cut down modeling time and make designs more flexible. A good sketch helps avoid errors and makes changes easier.
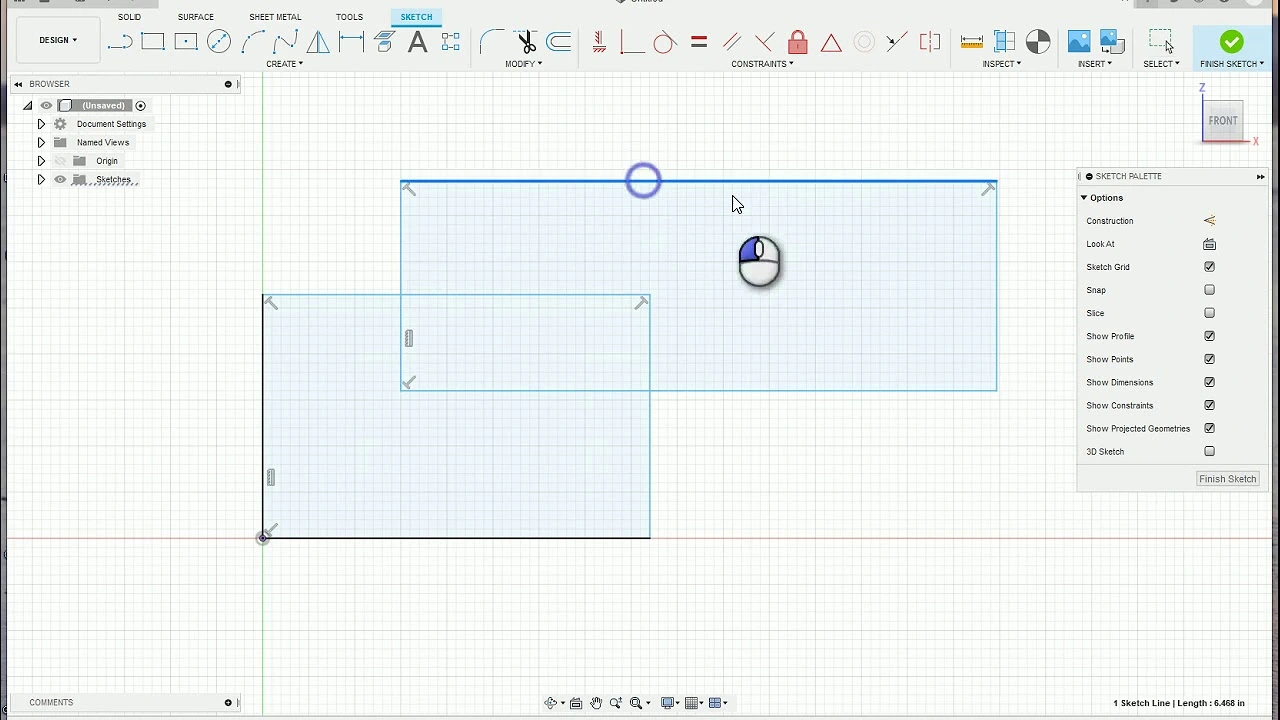
Tip overview of Sketch Environment
Fusion 360’s sketch environment starts your 3D designs. You’ll need to pick a plane or planar face when you select “Create Sketch” from the Solid tab in the Design workspace. Your model’s orientation in 3D space depends on this choice.
The Sketch contextual tab shows up after you pick a plane, giving you three key tool menus:
- Create – You can add simple geometry, mirror patterns, and project references
- Modify – You can offset geometry and add details like filets
- Constraints – You can control how geometry elements relate to each other
The Sketch Palette lets you control what you see – things like the grid, points, dimensions, and projected geometry. This layout helps you focus on what you’re doing.
Time-saving benefit of mastering sketches
Good sketches will save you time throughout your design work. Sketches that are fully constrained stay stable when you edit them, which stops errors from spreading and forcing you to start over. Taking time to constrain sketches might seem slow at first, but it pays off when you make changes later.
Keyboard shortcuts make sketch work much faster. You can press “X” to turn selected geometry into construction lines right away. These construction lines don’t define profiles but help position other geometry.
Fusion 360’s sketch environment stands out from other CAD tools. You won’t find separate 2D and 3D sketch environments with different tools – Fusion’s sketch geometry works in 3D from the start.
How to apply sketch best practices
Here’s how to create professional sketches in Fusion 360:
- Fully constrain your sketches – Make sure you can’t move any line or curve out of place. This matters even more in Fusion 360 since you can move sketch elements without opening the sketch first.
- Keep sketches simple – Add only the detail you need for each operation. Complex sketches can slow things down.
- Avoid 3D sketches when possible – Fusion 360 can handle 3D sketching, but it gets messy. Most designs work better in 2D mode.
- Be thoughtful about constraints – Use the “equal” constraint for matching lengths instead of adding dimensions twice. This lets you make changes in one spot.
- Express clear design intent – When you pick features to dimension, ask yourself if that’s how you’d explain it to someone else. This makes your sketches easier to understand.
Pro tip for sketching efficiently
You can work faster by turning off auto-projection features. These might seem helpful but can clutter your sketches. Expert users often disable “Auto project geometry on active sketch plane” to keep sketches clean.
A quick way to speed up work: right-click, hold, and drag up to repeat your last command. You can also hold the Ctrl key to stop snapping when you need precise placement without interference.
The padlock icon on the sketch feature tells you if your sketch is fully defined. This works better than trying to move elements around.
These Fusion 360 sketching tips will help you build models that update reliably. You’ll work better with your team and spend less time fixing design issues.
Use Constraints with Right-Click
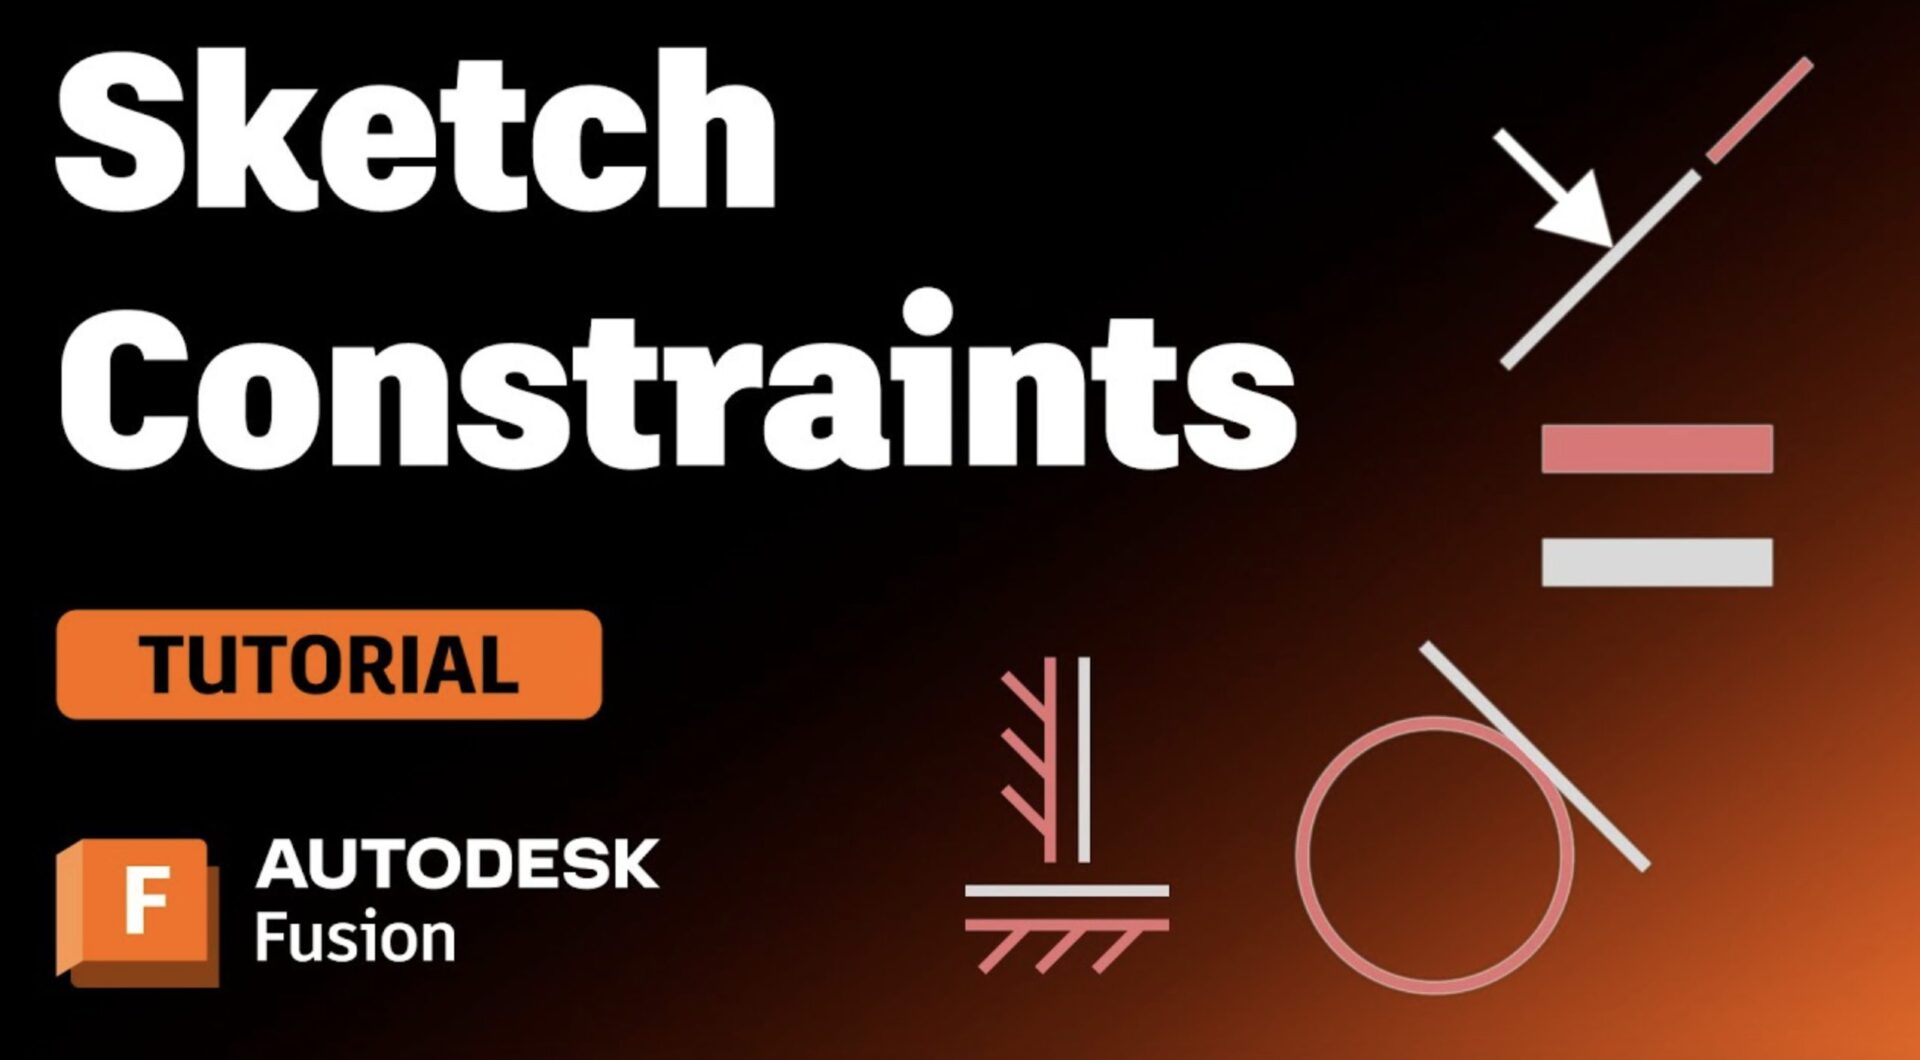
Image Source: Autodesk
Your CAD productivity depends on how well you manage constraints. Fusion 360’s constraint system is a quickest way to simplify your design workflow. It needs fewer steps and provides an accessible interface with immediate feedback.
Tip overview of applying constraints
Fusion 360 constraints determine how geometric elements connect. These include common types like Align, Flush, Tangent, and Rigid. Unlike traditional CAD programs that heavily depend on mates, Fusion lets you pick multiple references across multiple parts at once. The relationships auto-resolve in a logical way.
You need to identify the specific geometry before applying any constraint. This includes faces, edges, or vertices that you want to constrain. Fusion shows potential constraints as you hover over objects, such as midpoint connections that guide your selection process.
Time-saving benefit of right-click constraints
Right-click constraint method stands out among fusion 360 tips that speed up your workflow. A simple right-click shows all available constraints for your selected objects instead of switching between your design and constraints panel.
This method saves valuable time with each constraint application. The time saved adds up by a lot in complex projects. Fusion also provides visual previews and immediate feedback that leads to less guessing and more designing.
How to apply constraints quickly
Here’s how to use right-click constraints:
- Select a sketch entity or multiple entities while holding down the Shift key
- Right-click to display the marking menu with available constraints
- Choose the appropriate constraint from the menu
- Confirm the constraint application
This technique becomes powerful because the marking menu adapts based on your selection. You only see options that matter, which makes decision-making faster.
Pro tip for constraint selection
Cursor position plays a vital role in modifying sketches. You can combine constraints with Fusion’s As-Built Joints, Motion Links, and Contact Sets to get complete kinematic control when working with multiple components.
Fusion might add constraints you don’t need (common with autodesk fusion 360 tips for beginners). Just click the constraint icon and press delete to remove it. This gives you complete control over your design’s parameters.
Complex designs in Fusion 360 create an organized, clean browser of constraints. This differs from the messy lists you might know from other CAD programs. The organizational benefit becomes more valuable as your projects get complex, making it one of the best advanced fusion 360 tips for managing large assemblies.
Avoid the 3D Sketch Trap

Image Source: Product Design Online
3D sketching in Fusion 360 looks like an advanced feature but creates more problems than it solves. You can improve your design efficiency and avoid frustrating workflow barriers by knowing when not to use this feature.
Tip overview of 3D sketching
Fusion 360’s 3D sketch feature lets you create sketches beyond a single plane. You can draw lines and curves that move through three-dimensional space instead of staying flat. This seemingly powerful feature has major limitations that experienced designers have learned to work around.
The constraint system in Fusion 360 works best as a planar system. This makes 3D sketches hard to define and control. One experienced designer puts it well: “The whole constraint package is totally designed as a planar system”. Because of this basic limitation, some constraints just don’t work while keeping 3D sketch integrity.
Time-saving benefit of avoiding 3D sketches
Avoiding 3D sketches brings several workflow advantages:
- Improved performance: Large assemblies and complex designs slow down with 3D sketches
- Better constraint management: 2D sketches give you complete constraint control and make future changes more predictable
- Reduced troubleshooting time: Less constraint conflicts mean you spend less time fixing sketch problems
Using 3D solid patterns instead of sketch-based patterns often makes your work more efficient and flexible.
How to stay in 2D sketch mode
Here’s how to keep your sketching in 2D:
- Make sure the “3D Sketch” option stays unchecked in the sketch menu (it’s unchecked by default)
- Create multiple 2D sketches on different planes instead of combining everything in 3D
- Use the “Project” tool with the “link” option to move geometry between sketches
- Use “Intersection Curve” commands to create geometry where different planes meet
Working in 2D needs a different approach to complex geometries, but the benefits outweigh the learning curve.
Pro tip for sketch control
Experienced designers suggest alternatives when 3D sketches seem needed: “I’d rather draw a pair of fully defined sketches on orthogonal planes and use intersection curve than try fully defining a 3D sketch in almost any situation”. Small and focused sketches work better than complex ones.
Models become easier to modify and fix when you follow the rule that “10 small, simple sketches is way better than 1 complex sketch”. Give each sketch a clear label and stick to one goal per sketch to keep things clear and under control.
Use the Parametric Timeline Wisely
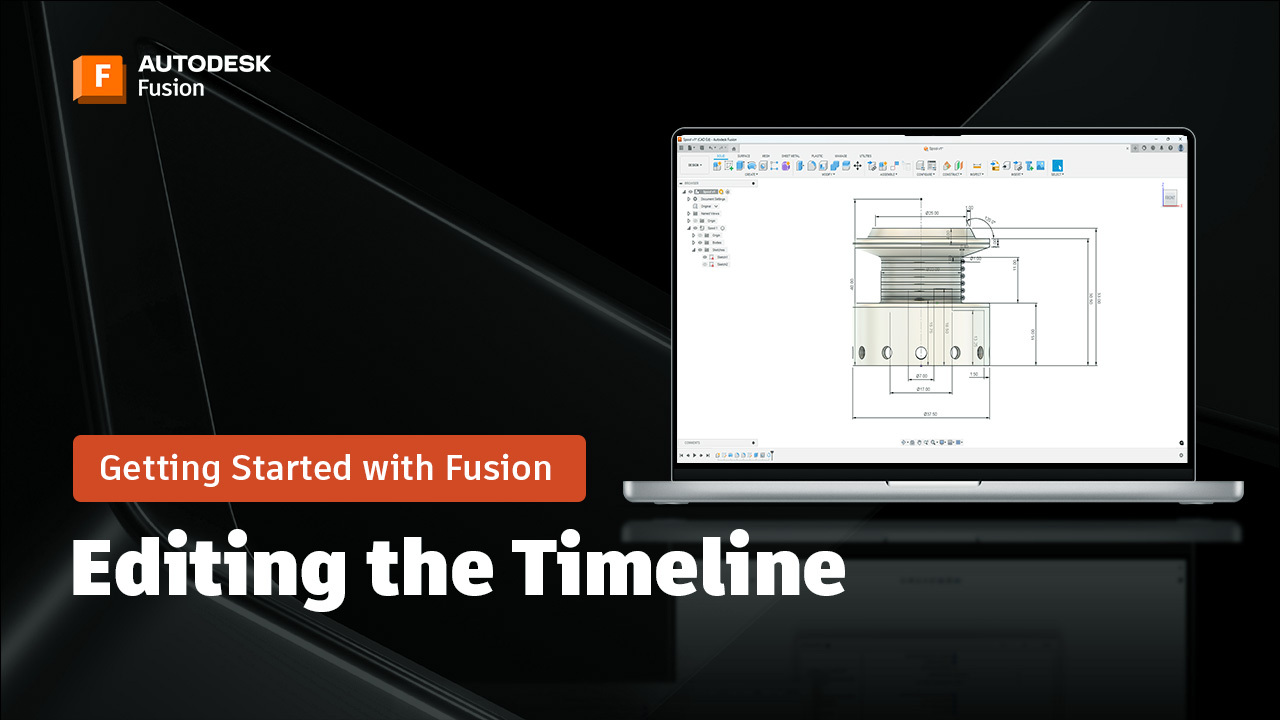
Image Source: Autodesk
Fusion 360’s parametric timeline is one of its most powerful features, yet many users don’t take full advantage of it. You’ll find it at the bottom of your interface. This chronological record of your design process provides amazing flexibility that sets expert users apart from beginners.
Tip overview of the parametric timeline
The timeline in Fusion 360 keeps track of each step you make—from sketches to features—in chronological order. You’ll see a complete record of every change in your design. The timeline lets you go back and adjust your earlier decisions while your model stays parametric.
A left-click on any timeline entry shows you the matching feature in your design. The left and right arrows next to the timeline help you move back and forth through your design history. This feature is a great way to get to the bottom of geometry problems or remove changes you don’t want.
Time-saving benefit of timeline editing
The real magic of the parametric timeline shows up when you need to change your design. Your design adapts on its own when you change dimensions because of parametric modeling. Let’s say you make a component’s diameter smaller – all related parts like grooves or holes move with it since they’re linked to key geometry.
You won’t need to start from scratch after making design changes. This gives you total control of your design process. You can fine-tune details, meet new requirements, and try different options without rebuilding everything.
How to use the timeline effectively
Managing your timeline becomes crucial as your designs get more complex. Here are some practical tips:
- Create groups by shift+left-clicking multiple items, then right-click and select “Create Group”
- Turn on Component Color Swatch from timeline settings to add color codes for each component
- Activate Component Color Cycling with Shift+N (Mac) or Ctrl+N (Windows) to match colors across parts, browser, and timeline
The timeline can stretch beyond your screen in bigger projects. Organizing related features into logical groups makes everything clearer and easier to navigate.
Pro tip for timeline navigation
You can watch your entire timeline play out to see how your model comes together. This helps when you’re learning from someone else’s design or fixing issues in your own work.
Here’s a faster way to edit dimensions in the 3D view:
- Expand the Sketches folder under your component
- Click the eyeball icon next to the sketch
- Right-click and select “Show Dimension”
- Double-click dimensions to update them right away without opening the sketch editor
The timing of your edits matters too. Parametric editing gives you complete control over design intent, but sometimes direct edits at the end of your timeline make more sense—especially when you’re getting ready for manufacturing or making small tweaks.
Pin Favorite Commands in the Toolbox
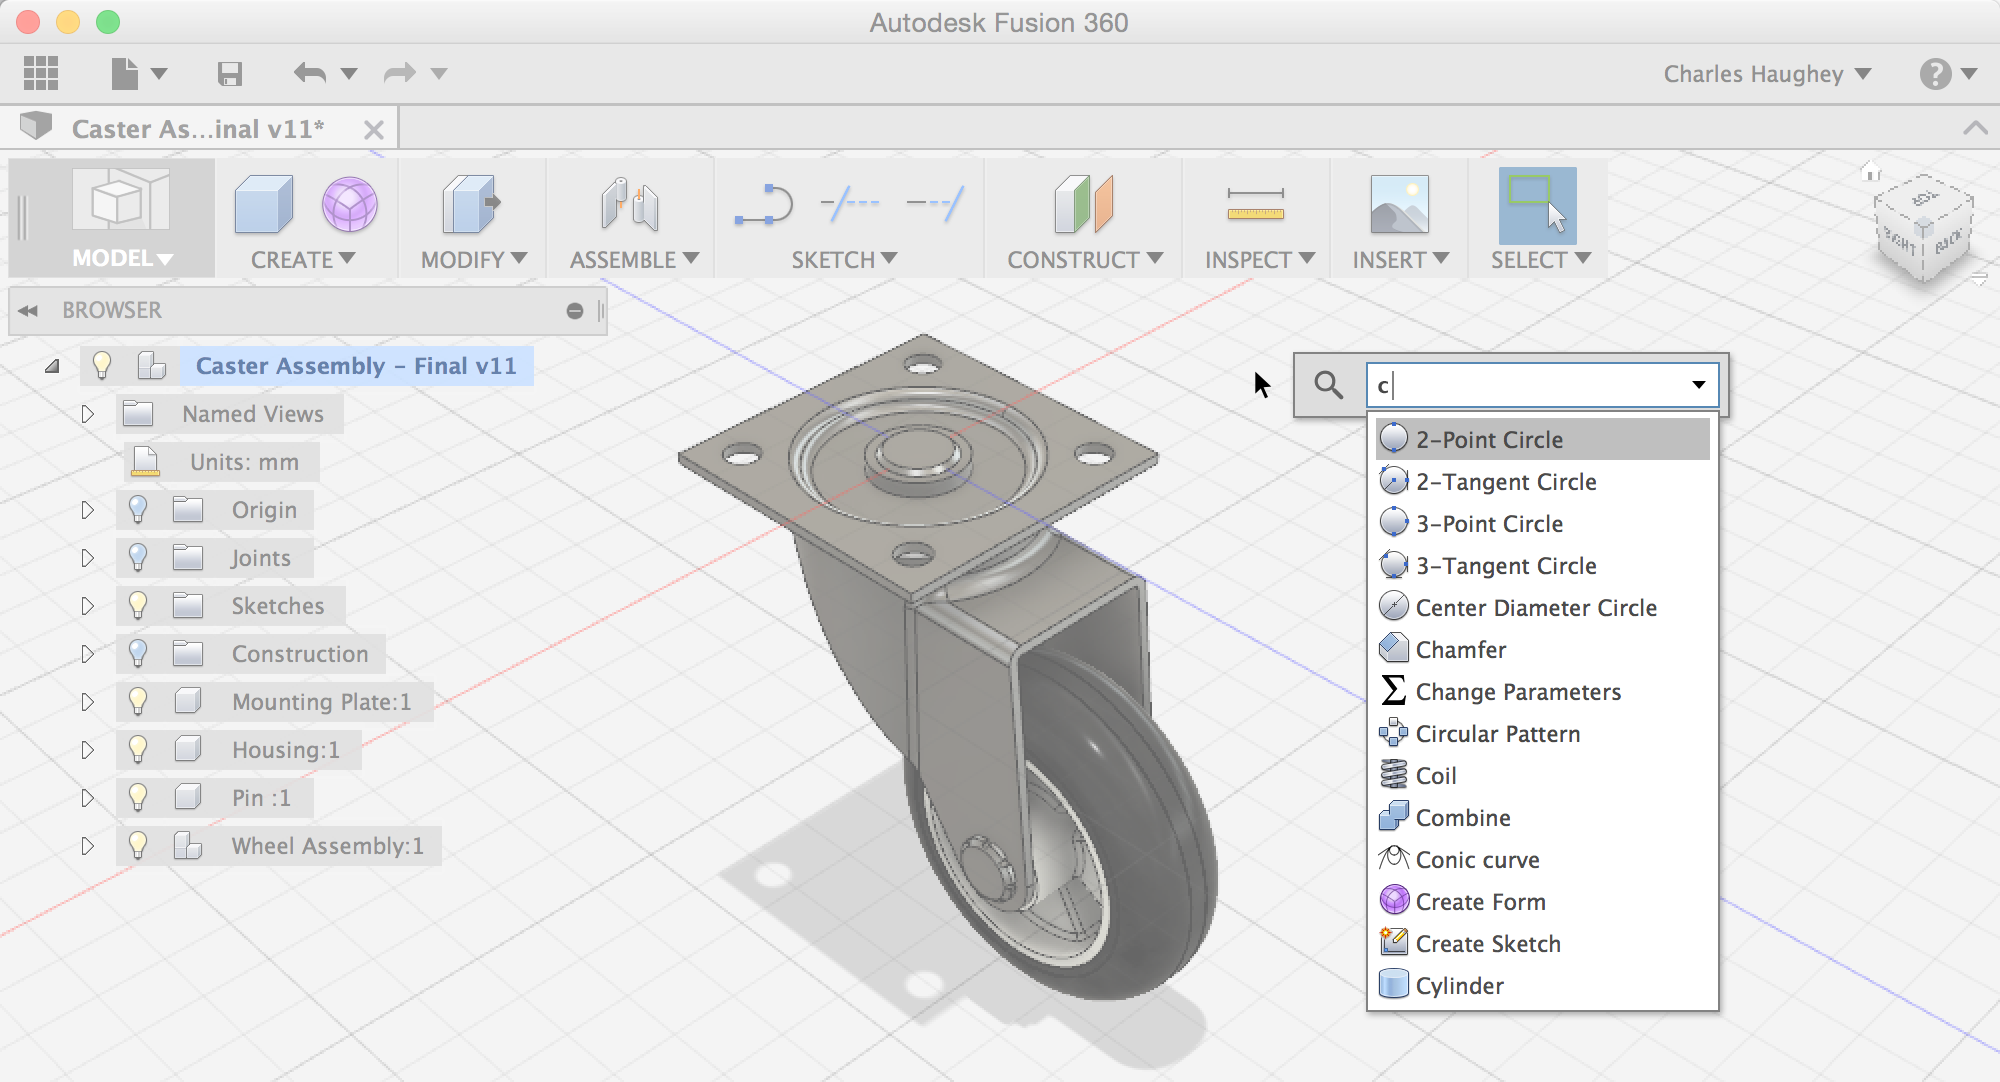
Image Source: Autodesk
Searching through nested menus in Fusion 360 to find a command can be frustrating. Smart designers know a simple keyboard shortcut that opens up customization options many users miss out on.
Tip overview of command pinning
The Toolbox works as your personal command center in Fusion 360. You can open it with a quick press of the ‘S’ key. A dialog box pops up and shows your current workspace name. This tool helps you search for commands and acts as a custom toolbar that changes based on your workspace.
Each workspace (Model, Render, Animation, etc.) comes with its own Toolbox setup. Your pinned commands stay relevant to what you’re doing. Many experts call it “the single most useful command in Fusion 360”.
Time-saving benefit of pinned commands
You won’t need to navigate through the top Ribbon menus when you pin your favorite commands. This saves precious seconds every time you use a command. The time saved adds up quickly in complex projects.
The Toolbox follows your mouse movements, making pinned commands easy to reach. You can access them wherever you work on your model. The best approach is to set up your pins when you start a project. This way, they’re ready whenever you need them.
How to pin commands in Fusion 360
Here’s how to use this feature:
- Press the ‘S’ key to open the command Toolbox
- Type the command name you want in the search bar
- Move your mouse over the command until you see an arrow icon on the right
- Click the arrow to pin that command to your Toolbox
You can remove unwanted commands by pressing ‘S’ again. Either click the X next to the command or drag it away from the Toolbox.
Pro tip for workspace setup
Can’t find certain commands? Reset your toolbar settings. Right-click any empty gray space in the ribbon menu. You can pick “Reset Panel Customization,” “Show all hidden panels,” or “Reset all toolbar customization”.
Your pinned commands stay specific to each workspace. This helps you create different command sets for sketching and modeling tasks. You’ll keep your interface clean while having quick access to the tools you need.
Pin commands you use often but can’t easily find in the ribbon menus. This helps beginners learn advanced Fusion 360 tips without wasting time searching through menus.
Edit Appearance Swatches for Custom Looks

Image Source: YouTube
Custom appearances can transform your Fusion 360 models into something way beyond simple colors. The visual presentation you choose could mean the difference between an ordinary design and one that truly shows your vision to clients and team members.
Tip overview of appearance editing
The appearance editing system in Fusion 360 lets you create tailored material finishes that you can save and reuse in different projects. You can access this feature from the Modify dropdown by selecting “Appearance” or just press the shortcut letter A. This brings up the appearance panel where browsing existing materials or creating custom ones becomes simple.
Fusion’s appearance system works by letting you duplicate existing appearances and modify their properties to create unique visual effects. This approach gives you nowhere near the limitations of the standard material library.
Time-saving benefit of custom swatches
A library of custom appearances will save you countless hours, especially with complex assemblies. Yes, it is worth noting that your custom appearances stay available to use in future projects.
The sidebar gives you a great way to save time – just drag appearances between components. This quick method helps standardize the look of multiple parts without selecting each surface individually.
The appearances tab makes things even better by showing all textures you’ve used in your project. Just drag a texture over another one in this tab and it automatically updates every component using that texture.
How to edit and save appearance swatches
Here’s how you create a custom appearance:
- Drag an appearance that looks close to what you want into the “In This Design” area
- Right-click the appearance and select Duplicate
- Right-click the duplicate and select Edit to give it a new name
- Click the Advanced button to see detailed settings
- Look under Parameters and select Image to bring in custom textures from your computer
- Play with settings like bump, roughness, and other properties
- Click Apply to save your custom appearance
Pro tip for visual consistency
The quickest way to work is to organize separate bodies into group folders before adding appearances. This setup lets you drop appearances right onto component groups in the sidebar and update multiple parts at once.
Complex designs with repeating visual elements need a “materials library” component that shows samples of each appearance in your project. This visual reference helps keep everything consistent as team members work through design iterations.
Use the Navigation Cube for Orientation

Image Source: Autodesk
The ViewCube in Fusion 360 is probably the most underrated navigation tool that could revolutionize your 3D modeling experience. You’ll find this cube-shaped widget in the upper right corner of your screen. It works as a 3D orientation indicator and gives you powerful control over your design view.
Tip overview of the navigation cube
Your current view direction shows up on the ViewCube as you move around your design. This visual guide lets you know exactly where you’re looking from, which makes working with complex models much easier. The ViewCube’s influence extends to everything in your design experience:
- Your lighting orientation (the shadow on the cube matches your model)
- Predictable orbiting with Constrained Orbit
- View selection for drawing documentation
The ViewCube becomes even more useful because its settings work differently between Model and CAM/Manufacture workspaces. This means you can set up different views based on what you need.
Time-saving benefit of quick orientation
The quickest way to cut down design time is to move smoothly in your 3D model. Many users spend too much time trying to orbit and pan to find the right angle. The ViewCube solves this problem by changing your orientation instantly.
A simple click on any face, edge, or corner of the cube smoothly rotates your view to that position. Quick access to standard views (top, front, right, etc.) helps you stay oriented during complex design work.
How to use the navigation cube effectively
Here’s how to make the most of the ViewCube:
- Click faces for orthographic views (top, front, right, etc.)
- Click edges for 45° views between adjacent faces
- Click corners for isometric views
- Drag directly on the cube for free rotation
Users work almost twice as fast when they drag instead of click for more precise control. On top of that, the ViewCube has a “snap-and-go” feature that automatically snaps to standard views when you drag within 10° of them.
Pro tip for view management
Sometimes Fusion’s default orientation might not match how you imagine your design. You can easily fix this by customizing the ViewCube orientation:
- Rotate your model to your preferred view
- Right-click the ViewCube
- Select “Set Current View As…” option
- Choose which view to redefine (front, top, etc.)
This setup makes sure the ViewCube arranges perfectly with your design vision. A quick click on the “Home” icon above the ViewCube takes you back to your starting view or centers your selected components. This saves valuable time when you work with complex assemblies.
Organize Projects for Better Collaboration
Image Source: Autodesk
Project organization plays a vital role alongside design skills in Fusion 360. A thoughtful setup from day one prevents confusion and makes complex projects run smoothly.
Tip overview of project organization
Fusion 360 gives you three project types that match your team’s needs. Open projects let all team members join automatically. Closed projects remain visible to everyone but need admin approval to join. Secret projects stay visible only to invited members. This setup creates a central hub where you can manage design files, track progress, and work together.
Time-saving benefit of structured projects
A well-laid-out project helps you avoid performance issues that often plague large, unstructured designs. Breaking designs into smaller, linked files maintains peak performance. Your files stay clean and lightweight, and team members can edit parts independently.
How to manage projects in Fusion 360
You should create dedicated folders before building complex models:
- Manufactured (for in-house designed components)
- Purchased (for off-the-shelf items)
- Drawings (for documentation)
- Hardware (for common components)
Your common components like hardware should live in separate projects that you can reference across multiple designs.
Pro tip for team collaboration
Your team’s needs should determine role assignments. Viewers get view-only access. Editors can modify files and invite members. Project Admins have complete control with approval rights. This permission structure gives everyone exactly the access they need.
Start with Simple Projects You Care About

Image Source: YouTube
Starting complex Fusion 360 projects too soon can leave you frustrated and stuck. Expert designers know that success comes from building a strong base with simple models.
Tip overview of project simplicity
Simple projects help you remember what you learn and put it to use. These projects aren’t just practice—they build your confidence in real-life design. Many Fusion 360 teachers suggest using everyday items like scissors or coffee cups as your first models. These objects teach you the basics without being too complex.
Time-saving benefit of focused learning
Quick wins from simple projects keep you motivated. Students who see results early stay interested and keep going. This focused way of learning builds your skills step by step on your trip, and you won’t feel the frustration that makes many beginners quit complex software.
How to choose beginner-friendly projects
Pick objects that have few parts and mean something to you. Here are some great starter projects:
- Stamp handles with interchangeable plates
- Simple household items you use daily
- Objects with basic mechanical functions
The official Autodesk courses teach you the right way to do things from day one.
Pro tip for motivation and growth
Work on projects you truly care about. Your passion will keep you going through tough learning phases. Simple projects also teach you vital concepts like tolerances and production limits—skills that become more valuable as your designs get complex.
Think Like an Engineer, Not Just an Artist
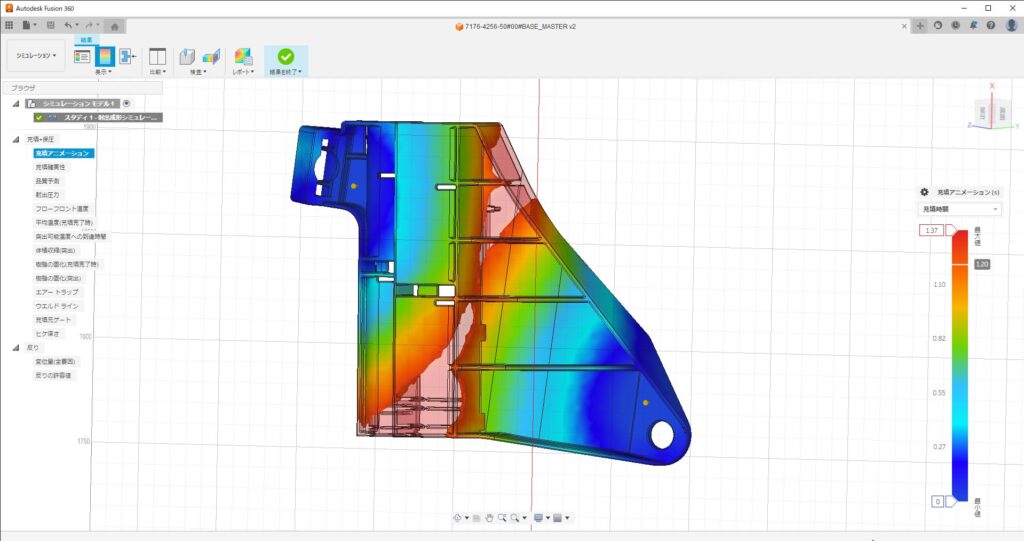
Image Source: Autodesk
Sound engineering principles are the foundations of successful Fusion 360 designs that work well in ground applications. Your workflow and outcomes will improve when you understand functional aspects beyond esthetics.
Tip overview of engineering mindset
Design for Manufacturing (DFM) stresses the need to think over manufacturing constraints and processes when you start designing. This method spots potential bottlenecks early and boosts production efficiency. Autodesk Fusion 360’s resilient features help you create designs that work for manufacturing, not just visual appeal.
Time-saving benefit of functional thinking
Engineering principles help you spot problems before they happen and reduce expensive revisions. Fusion 360’s simulation tools detect potential issues early. This eliminates wasteful trial-and-error cycles that get pricey in materials and time.
How to apply engineering principles
You can bring engineering thinking into your designs by:
- Working with manufacturing experts during early design phases
- Making design improvements based on practical feedback
- Using simulation tools to confirm functionality
- Setting parameters in advance for consistent scaling
- Building components for each individual physical body
Pro tip for design efficiency
Complex designs work better when you ask “what do you expect out of it?” before starting to model. A consistent naming system for your parameters will make sure dimension changes flow predictably through your model. This makes engineering changes simple even in complex assemblies.
Comparison Table
| List Item | Key Benefit | Main Features | Implementation Tips |
|---|---|---|---|
| Learn the Sketch Environment | Saves modeling time and makes designs more flexible | – Create/Modify/Constraints tool menus – Sketch Palette controls – Construction lines functionality | – Make sketches fully constrained – Keep sketches simple – Learn keyboard shortcuts |
| Right-Click Constraints | Speeds up work by cutting down menu navigation | – Smart constraint options – Visual previews – Live feedback | – Hold Shift to select multiple items – Right-click opens marking menu – Watch cursor position |
| Skip 3D Sketches | Better performance and easier constraint handling | – Better constraint control – Less troubleshooting – Stable models | – Work with multiple 2D sketches – Use Project tool with link option – Make intersection curves |
| Smart Timeline Management | Change designs without starting over | – Record of changes in order – Feature highlighting – Grouping capability | – Group related entries – Use component color coding – Turn on direct modification |
| Add Favorite Commands to Toolbox | Find commands faster | – Workspace-specific setups – Quick access dialog – Custom command sets | – Press ‘S’ key – Add common commands – Sort by workspace |
| Create Custom Appearance Swatches | Handle complex assemblies faster | – Make custom materials – Reuse appearances – Update multiple items at once | – Copy existing appearances – Group bodies together – Build materials library |
| Navigate with the Cube | Quick view changes and better orientation | – Standard view shortcuts – Snap-and-go features – Custom view settings | – Click faces for straight views – Edge clicks give 45° views – Drag for exact control |
| Set Up Projects for Team Work | Keep complex projects on track | – Three project types (Open/Closed/Secret) – Permission controls – Central file management | – Set up dedicated folders – Use distributed assemblies – Give proper roles |
| Begin with Simple Projects You Like | Build confidence and core skills | – Easy learning curve – Fast results – Practical uses | – Model items from home – Pick interesting projects – Follow clear steps |
| Design Like an Engineer | Fewer revisions and better products | – Manufacturing-focused design – Simulation tools – Parameter-based design | – Talk to manufacturing teams early – Run simulations – Set parameters first |
Conclusion
These ten hidden Fusion 360 tips will reshape your daily workflow from time-consuming to quick and simple. Your design process’s foundations lie in the sketch environment, and right-click constraints save you from endless menu navigation. Most designers learn that avoiding 3D sketches saves them from many headaches, especially with complex models.
A parametric timeline becomes your powerful ally if you use it wisely. You can revisit and change earlier design decisions without starting over. Pinning favorite commands puts your most-used tools right at hand and saves valuable time during large projects.
Custom appearance swatches do more than look good – they improve communication with clients and team members. People often overlook the navigation cube, but it gives you quick orientation and helps maintain spatial awareness during complex modeling tasks.
Project organization becomes significant as designs grow more sophisticated, especially when you have team collaboration. Starting with simple projects you care about builds confidence and basic skills before you tackle complex challenges.
Your designs will move smoothly from digital models to physical objects if you think like an engineer. All these techniques work together to give you a smooth Fusion 360 experience that balances creativity with productivity.
We hope these hidden Fusion 360 tips help you design better and faster. Becoming skilled at this powerful software takes time, but even trying a few of these strategies will improve your workflow dramatically. Which tip will you try first?